- Published on
The Best Guide to PWA with NextJS
- Authors

- Name
- Shaheer Mansoor
- @Twitter/ShaheerMansoor2
Creating PWA With Next.js
Table of Contents
What is PWA?
A Progressive Web App (PWA) is a web application that offers a native app-like experience using web technologies like HTML, CSS, and JavaScript. Key features include:
- Progressive: Works on any browser and device.
- Installable: Can be added to the home screen.
- Offline Capable: Functions without a network connection.
- Responsive: Adapts to different screen sizes.
- App-like: Mimics the look and feel of native apps.
- Secure: Served via HTTPS.
- Discoverable: Easily found by search engines.
- Re-engageable: Supports push notifications.
- Linkable: Shareable via URL.
Setting up in NextJS App
Creating a Next.js app
npx create-next-app next-pwa-test
When the app is created, install the required pwa dependency.
// if using npm
npm i next-pwa
// if using yarn
yarn add next-pwa
Generating a manifest
Before generating manifest, you can head to Application panel in Dev Tools, there select Manifest file. You will see you warnings.
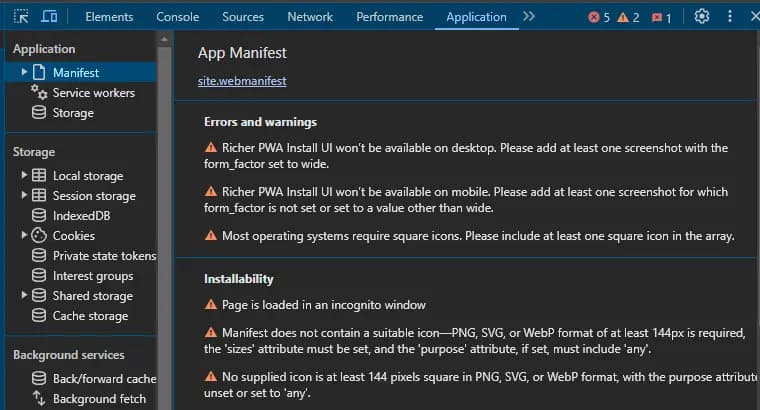
Don't worry we are going to fix it :)
Simicart is a great online tool for generating the manifest. Follow the link, fill up the input fields and provide site logo, and then hit generate.
Simicart will generate a zip file containing images of 4 sizes: 144x144, 192x192, 196x196, 256x256, 384x384 & 512x512 and a manifest.webmanifest, you change its name to site.webmanifest if you want.
extract the zipfile & paste it into public folder of the App.
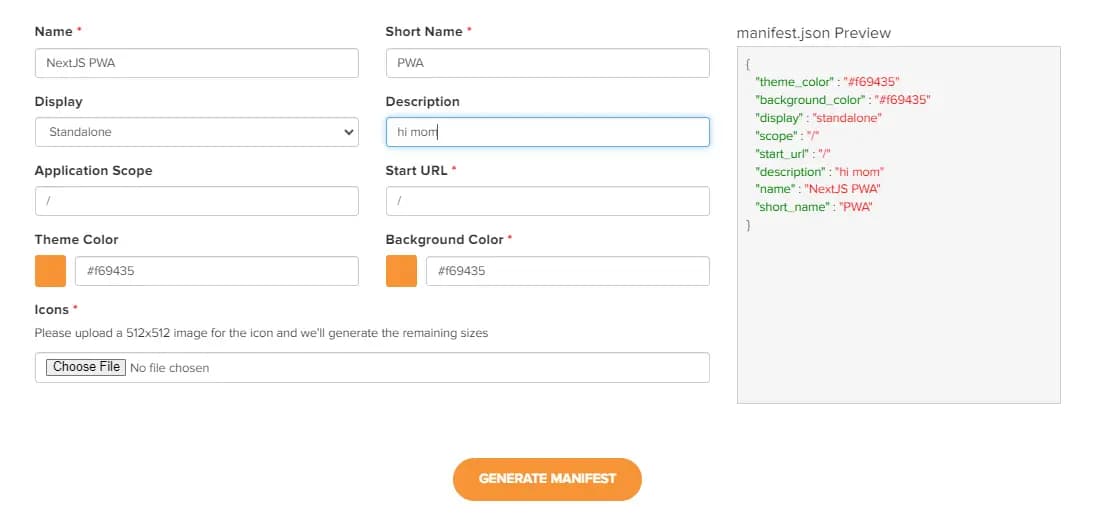
manifest.webmanifest file generated by Simicart.
{
  "theme_color" : "#f69435",
  "background_color" : "#f69435",
  "display" : "standalone",
  "scope" : "/",
  "start_url" : "/",
  "description" : "hi mom",
  "name" : "NextJS PWA",
  "short_name" : "PWA",
  "icons": [
    // You need to create these first 2 aswell,
    // I used Photoshop.

    // This one is a special icon & is required
    {
      "src": "/static/favicons/icon-144x144.png",
      "sizes": "144x144",
      "type": "image/png",
      "purpose": "any"
    },
    // This one is also special icon & is required
    {
      "src": "/static/favicons/icon-196x196.png",
      "sizes": "196x196",
      "type": "image/png",
      "purpose": "maskable"
    },
    {
      "src": "/static/favicons/icon-192x192.png",
      "sizes": "192x192",
      "type": "image/png"
    },
    {
      "src": "/static/favicons/icon-256x256.png",
      "sizes": "256x256",
      "type": "image/png"
    },
    {
      "src": "/static/favicons/icon-384x384.png",
      "sizes": "384x384",
      "type": "image/png"
    },
    {
      "src": "/static/favicons/icon-512x512.png",
      "sizes": "512x512",
      "type": "image/png"
    }
  ]
}
This is a basic manifest file. but you can also include Richer PWA install UI for desktop and mobile.
Richer PWA install UI
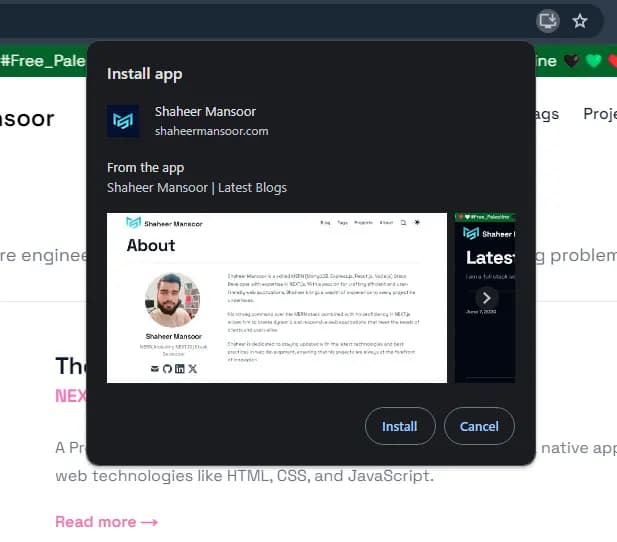
This means when you click install or add button on desktop or mobile respectively you will get to see some screenshots.
Desktop Richer PWA
Take some screenshots of your website on desktop.
Mobile Richer PWA
Take some screenshots of your website on mobile.
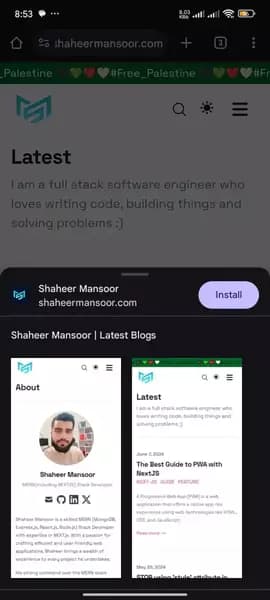
Now create a new array of objects for your screenshots(desktop and mobile), so these can visible when installing.
  "theme_color" : "#f69435",
  "background_color" : "#f69435",
  "display" : "standalone",
  "scope" : "/",
  "start_url" : "/",
  "description" : "hi mom",
  "name" : "NextJS PWA",
  "short_name" : "PWA",
  "icons": [
    // Your Icons
  ],
  "screenshots": [
      {
        "src": "/static/favicons/screenshot-desktop-1.webp",
        "sizes": "640x320",
        "type": "image/webp",
        "form_factor": "wide",
        "label": "Shaheer Mansoor About"
      },
      {
        "src": "/static/favicons/screenshot-desktop-2.webp",
        "sizes": "640x320",
        "type": "image/webp",
        "form_factor": "wide",
        "label": "Shaheer Mansoor"
      },
      {
        "src": "/static/favicons/screenshot-mobile-1.webp",
        "sizes": "320x640",
        "type": "image/webp",
        "label": "Shaheer Mansoor"
      },
      {
        "src": "/static/favicons/screenshot-mobile-2.webp",
        "sizes": "320x640",
        "type": "image/webp",
        "label": "Shaheer Mansoor"
      }
    ]
Adding Manifest to Layout of App
For Page Router
Create _document.js in the pages folder and add the following piece of code.
  import Document, { Html, Head, Main, NextScript } from 'next/document'

  class MyDocument extends Document {
    render() {
      return (
        <Html>
          <Head>
            <link rel="manifest" href="/static/favicons/site.webmanifest" />
            <link rel="apple-touch-icon" sizes="76x76" href="/static/favicons/apple-touch-icon.png" />
            <meta name="theme-color" content="#fff" />
          </Head>
          <body>
            <Main />
            <NextScript />
          </body>
        </Html>
      )
    }
  }

  export default MyDocument
For App Router
But if you are using Next 13+ App Router you can add the link tags in your RootLayout head tag.
export default function RootLayout {
    return (
      <Html>
        <Head>
          <link rel="manifest" href="/static/favicons/site.webmanifest" />
          <link rel="apple-touch-icon" sizes="76x76" href="/static/favicons/apple-touch-icon.png" />
          <meta name="theme-color" content="#fff" />
        </Head>
      </Html>
    )
  }
Configuring PWA in Next config
Now, add some data for configuring the PWA, add the snippet below in next.config.js.
  const withPWA = require("next-pwa");

  module.exports = withPWA({
    pwa: {
      dest: "public",
      register: true,
      skipWaiting: true,
    },
  });
This is just a simple configuration. BUT if you have a little complex app you can follow this pattern:
  const withPWA = require('next-pwa')({
    dest: 'public',
    register: true,
    skipWaiting: true,
  })

  // Your Content Security Headers Here
  //-------------------------
  //-----------------

  /**
  * @type {import('next').NextConfig}
  **/
  const nextConfig = {
    reactStrictMode: true,
    pageExtensions: ['ts', 'tsx', 'js', 'jsx', 'md', 'mdx'],
    eslint: {
      dirs: ['app', 'components', 'layouts', 'scripts'],
    },
    images: {
      remotePatterns: [
        {
          protocol: 'https',
          hostname: 'picsum.photos',
        },
      ],
    },
    async headers() {
      return [
        {
          source: '/(.*)',
          headers: [...securityHeaders],
        },
      ]
    },
    webpack: (config, options) => {
      config.module.rules.push({
        test: /\.svg$/,
        use: ['@svgr/webpack'],
      })
      return config
    },
  }

  // Here you can do module.exports
  module.exports = withPWA(withContentlayer(withBundleAnalyzer(nextConfig)))
🥳 Congrats Your Progressive Web App is created.
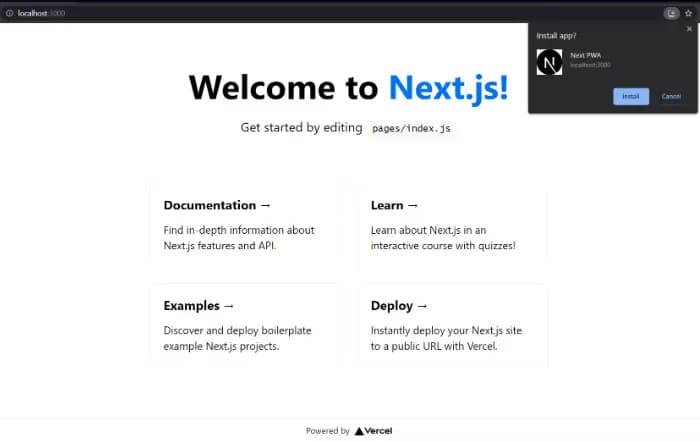
Protips :)
Shortcuts in PWA
You can add shorts to your PWA app for mobile version as you can see in image.
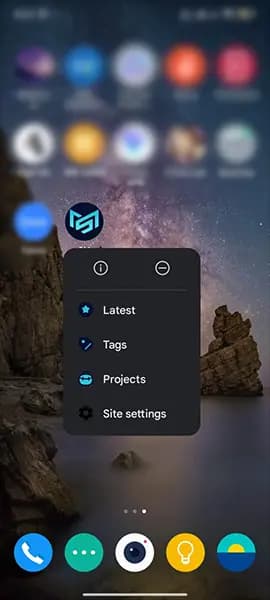
Create an array of objects in order to add Shortcuts to your PWA.
  "theme_color" : "#f69435",
  "background_color" : "#f69435",
  "display" : "standalone",
  "scope" : "/",
  "start_url" : "/",
  "description" : "hi mom",
  "name" : "NextJS PWA",
  "short_name" : "PWA",
  "icons": [
    // Your Icons
  ],
  "screenshots": [
    // Your Screenshots
  ]
  "shortcuts": [
    {
      "name": "Latest Blogs by Shaheer Mansoor",
      "short_name": "Latest",
      "description": "Go to blog page",
      "url": "/",
      "icons": [{ "src": "/static/favicons/star-icon.svg", "sizes": "192x192" }]
    },
    {
      "name": "Blog Tags in whole Website",
      "short_name": "Tags",
      "description": "See all Blog Tags",
      "url": "/tags",
      "icons": [{ "src": "/static/favicons/tag-icon.svg", "sizes": "192x192" }]
    },
    {
      "name": "Projects done by Shaheer Mansoor",
      "short_name": "Projects",
      "description": "Go to Project Page",
      "url": "/projects",
      "icons": [{ "src": "/static/favicons/project-icon.svg", "sizes": "192x192" }]
    },
    {
      "name": "Learn More about Shaheer Mansoor",
      "short_name": "About",
      "description": "Go to About Page",
      "url": "/about",
      "icons": [{ "src": "/static/favicons/user-icon.svg", "sizes": "192x192" }]
    }
  ]
Adding the auto-generated files to .gitignore.
Before Building the app, add these in your .gitignore file, because these files are updated constantly,
  # PWA files
  **/public/sw.js
  **/public/workbox-*.js
  **/public/worker-*.js
  **/public/sw.js.map
  **/public/workbox-*.js.map
  **/public/worker-*.js.map
These are not needed in your GitHub. So, do the following to remove them from production.
- Delete
sw.js,sw.js.map,workbox-\***\*.jsandworkbox-\*\***.js.map.
Disabling PWA in development
In development, you can disable PWA because it gives a lot of console messages.
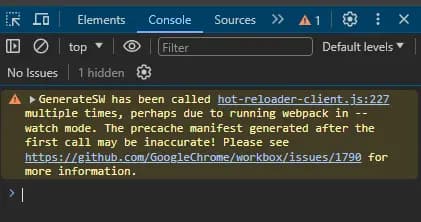
  const withPWA = require("next-pwa");

  module.exports = withPWA({
    pwa: {
      dest: "public",
      register: true,
      skipWaiting: true,
      // add the line below
      disable: process.env.NODE_ENV === "development",
    },
  });
Thank you so much for reading <3